Thermal printers are inexpensive, fast, and easy to integrate into embedded systems, kiosks, POS terminals, and photo booths. However, printing photos on thermal paper comes with a unique challenge: images often appear too dark, lose detail, or turn into unrecognizable black blobs.
Unlike inkjet or laser printers that can reproduce millions of colors, thermal printers work in monochrome. Every pixel must ultimately become either black or white.
Because of this limitation, the quality of a thermal photo depends far more on image processing than on the printer itself.
In this article, we'll walk through a practical image-processing pipeline that transforms a camera photo into a high-quality thermal print.
Why Thermal Photos Often Look Bad
Let's start with a common scenario.
A camera captures an image at 1280×720 pixels, while a typical 58mm thermal printer supports only about 384 dots in width.
That means the image must be reduced by roughly 70% before printing.
If resizing is done incorrectly, important details disappear long before the image reaches the printer.
Lighting conditions create another challenge. Many kiosks and embedded devices operate in environments with inconsistent lighting, resulting in underexposed images with a narrow tonal range.
When these images are converted directly to black and white, the final print often appears muddy and overly dark.
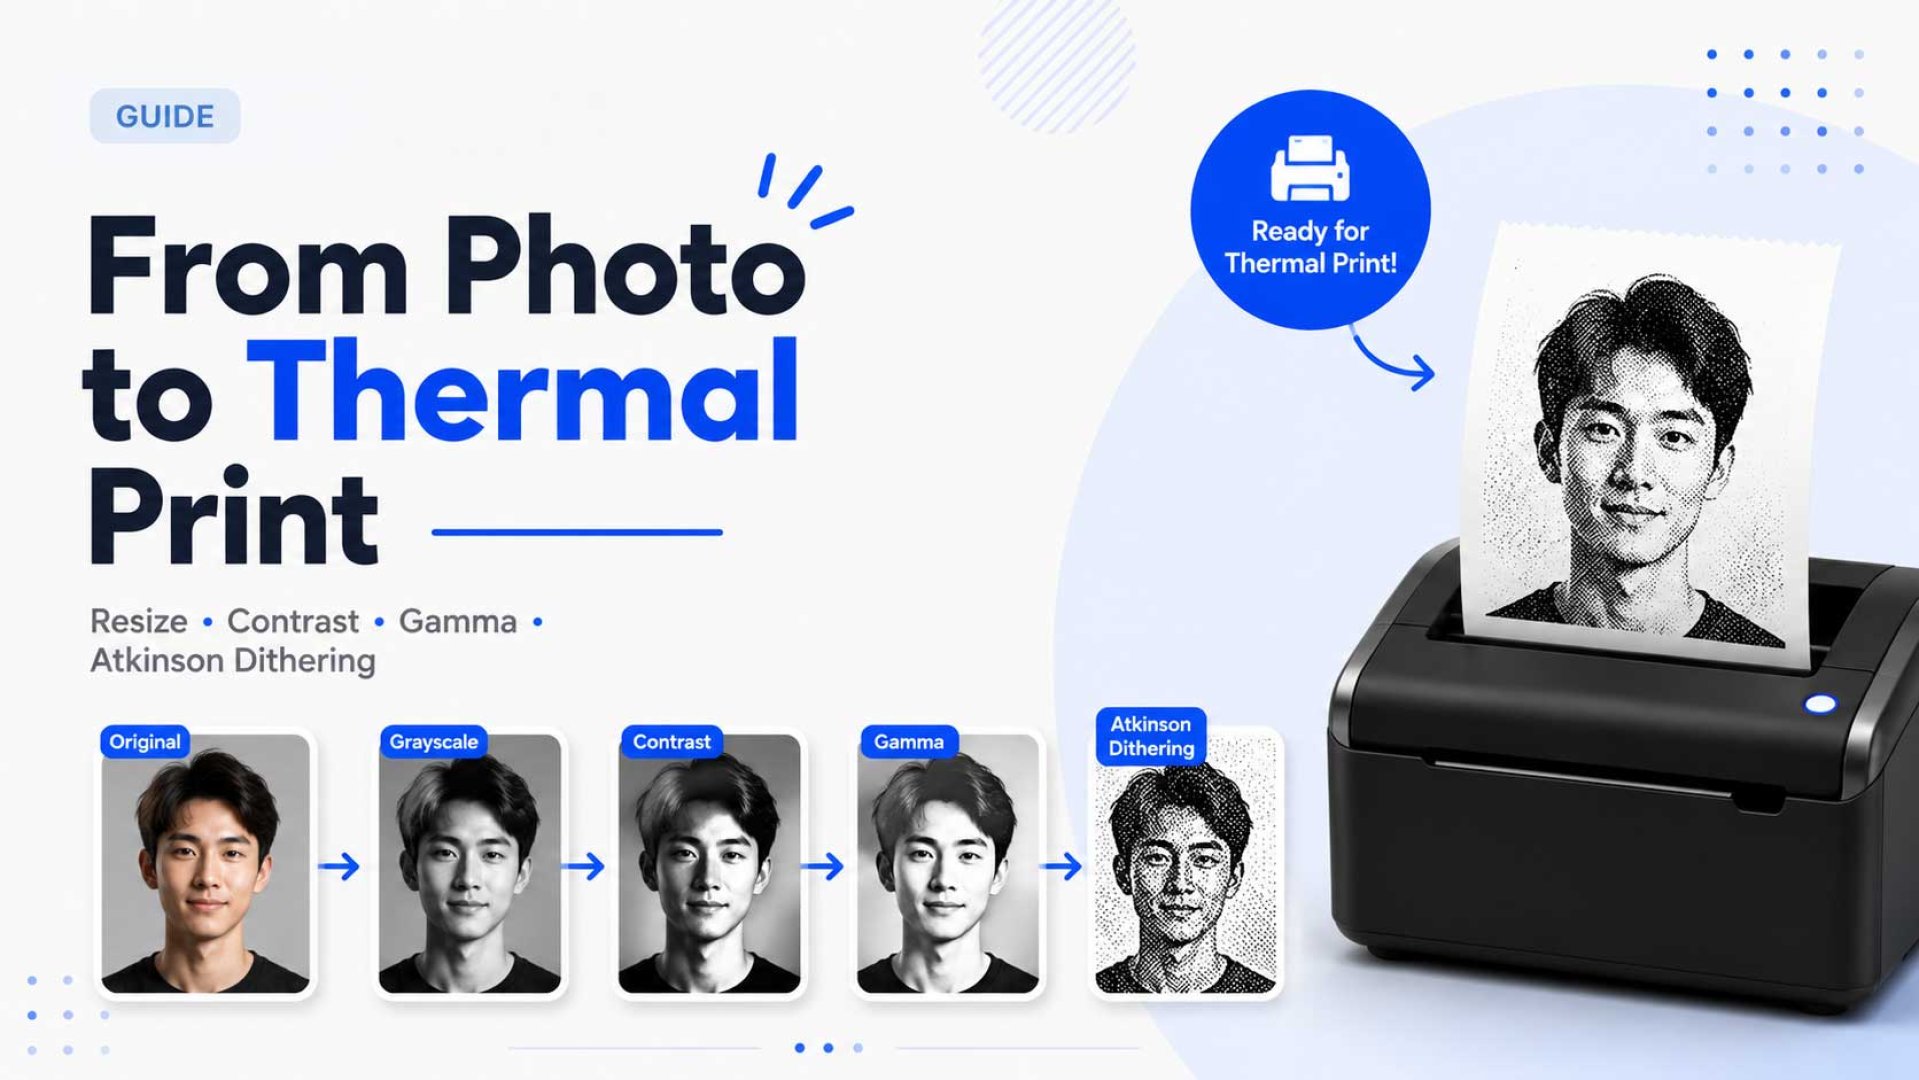
The Recommended Processing Pipeline
Camera Photo
      ↓
Resize
      ↓
Grayscale
      ↓
Contrast Stretching
      ↓
Gamma Correction
      ↓
Atkinson Dithering
      ↓
1-Bit Bitmap
      ↓
Thermal Printer
The order matters. Each stage prepares the image for the next one.
Step 1: Resize Before Dithering
If there is one rule worth remembering, it's this:
Always resize before dithering.
A common but incorrect workflow looks like this:
1280×720
   ↓
Dither
   ↓
Resize to 384px
Error-diffusion algorithms such as Floyd-Steinberg and Atkinson distribute quantization errors based on neighboring pixels.
When a dithered image is resized afterward, those carefully generated patterns become distorted.
The correct workflow is:
1280×720
   ↓
Resize to 384px
   ↓
Dither
This allows the dithering algorithm to work directly on the printer's final pixel grid.
Step 2: Convert to Grayscale
Thermal printers cannot reproduce color, so the image must first be converted to grayscale.
The recommended method is:
Gray = 0.299R + 0.587G + 0.114B
This formula better reflects human brightness perception than a simple RGB average.
Step 3: Stretch the Contrast
Images captured in low-light environments often occupy only a small portion of the available grayscale range.
50–150
instead of:
0–255
Contrast stretching expands the available tonal range, improving separation between dark and bright regions.
Without this step, dithering has less information to work with.
Step 4: Apply Gamma Correction
Contrast stretching increases dynamic range, but it does not change how pixel values are distributed.
Most underexposed photos still contain a large concentration of dark pixels.
Gamma correction helps brighten midtones without clipping highlights.
Gamma = 0.5

0.25 → 0.50
0.50 → 0.71
0.75 → 0.87
For thermal printing, gamma values between 0.4 and 0.6 often produce excellent results.
Step 5: Apply Atkinson Dithering
The final grayscale image must be converted into pure black and white.
Why Not Use a Simple Threshold?
< 128 = black
≥ 128 = white
A simple threshold discards most gray information, causing visible detail loss.
Dithering distributes quantization errors to neighboring pixels, creating the illusion of continuous tones.
Floyd-Steinberg vs Atkinson
| Characteristic | Floyd-Steinberg | Atkinson |
|---|---|---|
| Error retained | 100% | ~75% |
| Overall image | Darker | Brighter |
| Grain pattern | Stronger | Softer |
| Thermal printing | Good | Excellent |
Because thermal paper naturally tends to darken images, Atkinson's brighter output becomes an advantage.
Fine details remain visible and large dark areas are less likely to merge into solid black blocks.
Converting to a 1-Bit Bitmap
Once dithering is complete, every pixel becomes either black or white.
0 = white
1 = black
The image can then be packed into a 1-bit bitmap and transmitted to the printer using ESC/POS raster commands such as GS v 0.
Key Takeaways
- Resize the image before dithering.
- Use luminosity-based grayscale conversion.
- Stretch contrast to utilize the full tonal range.
- Apply gamma correction to brighten midtones.
- Use Atkinson dithering for thermal printing.
- Convert the final image into a 1-bit ESC/POS bitmap.
If you remember only one thing from this article, remember this:
Never resize an image after dithering.
With the right processing pipeline, even a low-cost thermal printer can produce surprisingly detailed and recognizable photographs.